Mortal Kombat 11 – In-depth Towers of Time Guide
Mortal Kombat 11 has several unlockables that can be gained for each character by either unlocking items in the Krypt, or by completing the Towers of Time. Instead of the Klassic Towers which gives you a character ending and some Koins for each completion, the Towers of Time provide several towers and challenges and in return players get a full set of goodies. In each Towers of Time session there is the paid Character Tower, one “Gauntlet” Tower, one Summoned Tower, and three random towers.
Before Starting
Tower Konsumables come in two different forms, Whole Tower Konsumables, and Single Fight Konsumables. Whole Tower Konsumables that work for one tower have abilities that will generally weaken a tower section, depending on their modifier element. So players would use a Whole Tower Konsumable to either buff up their elements, or gain more experience after fights. You would use a fire-buffing Whole Tower Konsumable if you plan on using fire and the same would go for other elements. Be careful some Konsumables come with a price; for example, a White Lotus Challenger’s Medallion will cause players to not continue during a tower, though you will gain double profile and gear experience.
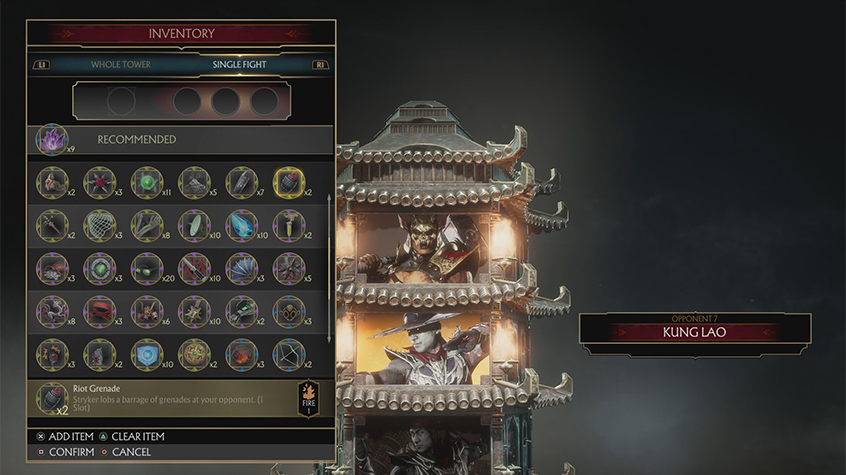
Single Fight Konsumables are single-match use items. You can bring these along for a fight in a tower, but you’ll need to use another Konsumable to replace the one you used in the previous match. These can do things like summon characters to attack during a combo, or deal extra hits during a fight. They can also defend the player from elemental damage though you’ll need a lot if a tower modifier’s element is too much to handle.
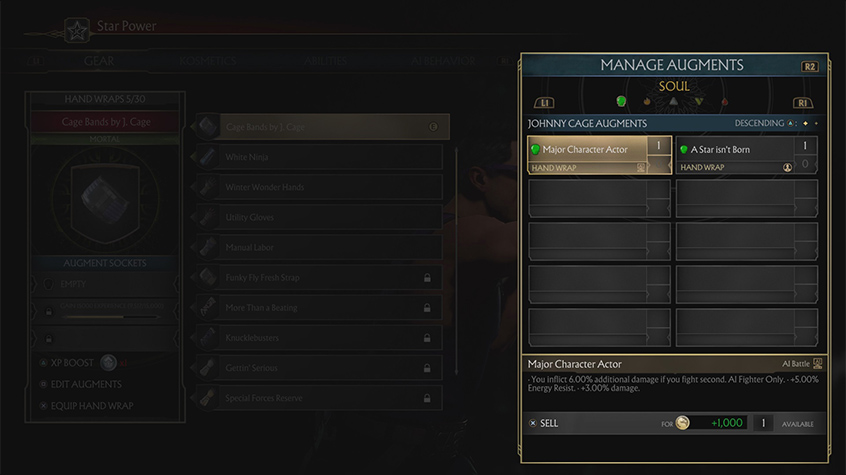
Augments can be assigned to character-specific equipment. These augments will generally increase a character’s stats during the Towers of Time while giving the players other buffs. These include defense against certain elements and more damage for fireballs. Unfortunately the augments you can put in your equipment depend on the equipment themselves, so make sure you’re able to equip all of your augments properly.
Finally there’s the AI. Before selecting your fighter, you have the ability to switch to your AI. Enemy AI have the tendency to be particularly be aggressive during the Towers, so if you don’t think that you can handle a tower, just send an AI to fight for you. Depending on who you choose to fight and how you Kustomize them in the character Kustomization screen, you can have them ready for any situation.
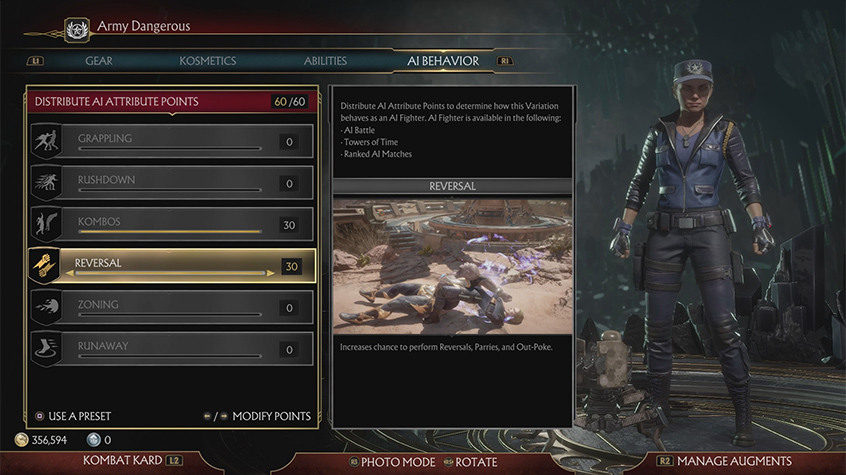
Generally, characters like Sonya Blade and Noob Saibot have high combo potential and are for some reason aggressive in Tower Fights. If you simply want to speed through a tower segment, just put 30 points to both Kombos and Reversals for Sonya Blade’s AI Behavior and they’ll go ham. Unfortunately they will falter if an enemy is using a proximity modifier such as freezing or getting set on fire. So while AI are indeed helpful, players shouldn’t rely on them for every tower. In fact, some tower challenges won’t let you use AI, so pick your favorite character and learn their combos as well.
Konquer Towers of Time
The towers vary in size and challenges and will generally kick up in difficulty the further down the Tower path you go. While the towers are timed and may expire from a few days to couple of hours, they do save progress in between if players decide to switch before finishing a whole island. It’s recommended that players try to finish an entire tower section before moving on to a different one.
The Gauntlet
The Gauntlet tower features a long series of fights with generally increasing difficulty as the stages go on. Along with long fights and a large amount of opponents, the challenges will raise in difficulty after beating a whole stage of The Gauntlet. The stages never get easier and will feature modifiers that will get harder and harder to deal with. So if you can, save up Konsumable until you lose a fight, then take a rematch and decide on your plan of action afterwards.
The Gauntlet’s time never runs out, so players should use The Gauntlet if they want to gain plenty of extra Augments, Koins, and Time Krystals.
Random Tower Rotations
Random Rotating Towers involve a specific challenge with character whose items you’re unlocking, not playing as. If not Kosmetics, they will give both augments and Konsumables. A Kano tower may involve Kano assisting opponents during the fight, and a Skarlet Tower will probably involve things such as Blood Balls and Blood Missiles being summoned against you during the fight.
The final challenge will usually pit you against the character you’re getting rewards for and as the final tower in their section, they will have a bit more health, and play more aggressively than opponents in the previous fights. It will take a bit more work to defeat the final opponent in these towers but not too much.
If you complete these towers during the time they’re available, you’ll also unlock Brutal Difficulty which will make the fights more aggressive. Fortunately you also get more rewards afterwards for beating it again on this difficulty.
Paid Character Towers
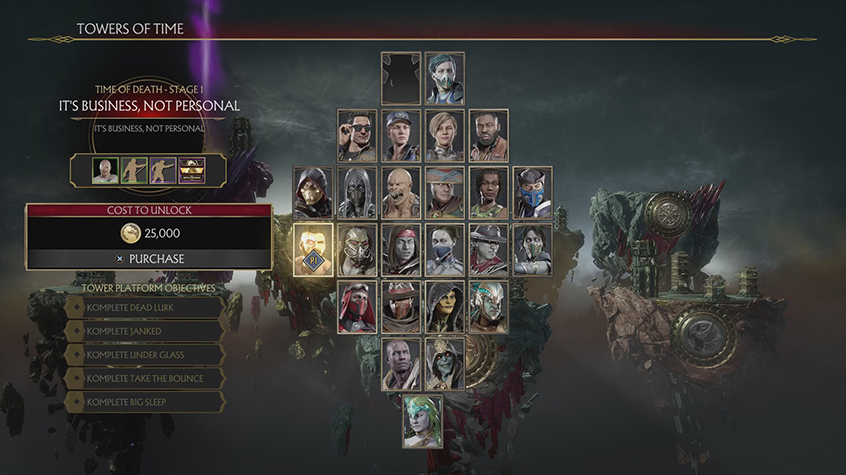
Paid Character Towers can be found on the top left area of the map. These character towers will exclusively give players augments, equipment, and Kosmetics for the character of their choosing. After paying 25,000 Koins to buy the first stage of the character tower, you must go through their set of challenges by playing as them. These rewards are greater and more prominent since you get everything for the character you play as. The only problem is that these towers are a bit more demanding as some of the challenges for even entering some of the towers are locked behind menial tasks including doing 50 grapples as or 50 uppercuts as a specific character.
After beating the full stage of challenges, players can pay more Koins in order to play stage 2 of the Character Tower. This will add more challenges and more chances to unlock stuff for a player’s favorite character. Unfortunately the price can be a bit steep as players must pay 50,000 Koins and 75,000 Koins consecutively for the last two stages.
Summoned Towers
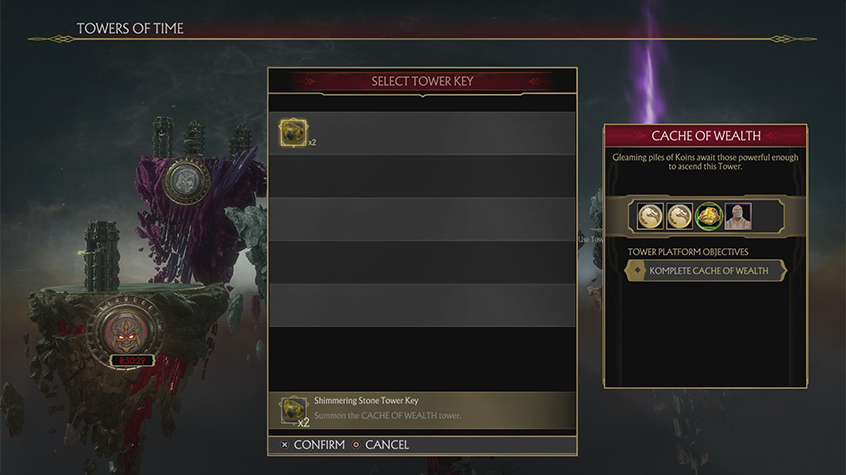
Using a Tower Key which is found through Tower rewards, players can summon one Tower to play through for one hour. The type of Tower and rewards it gives depends on the key used to unlock them. A Shimmering Stone Tower Key will activate a Cache of Wealth Tower which rewards players with large amounts of money and other rewards. While the tower mostly needs Konsumable management, it’s about as challenging as the hourly Towers.
Boss Towers
Finally, there are the Boss Towers tend which to change from Tower to Tower. Sometimes it will only be one enemy that players can fight fairly easily while other times the boss will require players to team up in a 3v1 match against a particularly powerful foe.
In regards to fighting the one-powerful boss, these can be exceptionally challenging. It takes three players with three pre-set power-ups given to each. These can include stuns, extra hits, armor, and more health. Since fights are still 1v1 the other two teammates will activate their abilities for the current fighter depending on the situation as backup. This is definitiely helpful as bosses will tend to have large amounts of health and will require all players to activate their abilities for their teammates at needed times.
For example, if an opponent is in the middle of doing a large combo, activate a stun or an extra hit to push the enemy away. If their health is low, use a health item or try to give players shields right when the opponent attacks.
After the first teammate dies, the second in line goes and everyone must try to help him defeat the boss. If the last teammate dies, you must start the fight all over again. So work together, and give your teammates all the help they need.