Torbjorn Re-Forged – Torbjorn 2.0 Rework In-Depth Guide: Overwatch
Torbjorn was updated recently to reduce his ‘feast or famine’ nature, and move him from his static defense role into something with a bit more meat in his kit. To make him more flexible in a variety of situations, the scrap system is now gone, his turret is easier to deploy and more versatile, and his armour pack has been replaced by Overload: a powerful new steroid that amps up Torb’s damage, similar to the old iteration of Molten Core. Finally, the new Molten Core provides an extremely strong area denial ability, and makes Torbjorn incredibly powerful as an anti-stall hero to unstick stalemate defenses. And that’s not all that has changed, they even reduced his head hitbox by 10%.
https://youtu.be/weR9hB6NmI4
Today we’ll be looking at his new kit and evaluating Torbjorn’s strengths and weaknesses in the current meta. So without further ado, I’m Jake ‘FaultyOptics’ Logan, and welcome to this guide from Gaming Instincts, for Torbjorn 2.0.
We’re going to get started with his weapons first though, which aid the rise of a new, independent Torbjorn.
The Rivet Gun:
So, the damage of the Rivet Gun primary fire wasn’t changed, but the projectile and reload speeds were. This means that you should be able to keep firing more often and with greater accuracy. Accuracy is actually the name of the game here – with 140 damage crits, and a really respectable rate of fire, the Rivet Gun’s primary fire puts out a substantial amount of damage across a decent range. It’s worth taking note that there is no fall-off on the damage of the Rivet Gun’s primary fire, so get used to that arc-projectile. You’ll have to lead your target and aim with space for the dropping projectile, but the shots can easily destroy squishy targets and tanks alike. It also has a cool new interaction with Torb’s new turret, where hitting a target with primary fire will redirect your turret’s shots to the target you hit. This is useful when you want to focus someone down quickly, or for asking the turret to hit a slippery target for you.
The secondary fire mode is the shotgun spray – now it’s a star pattern and with less damage than before, but with a higher rate of fire and reload speed. The secondary fire mode’s damage does fall off significantly at range, and the star-shaped spread will mean that as you get further from your target you’ll be hitting with significantly less pellets. This means the focus has shifted from spraying with your primary and using the shotgun form when up close. Now, Torb players will want to be using (and hitting) with his primary fire nearly all the time, with the shotgun reserved almost exclusively for destroying tanks shields up close. The shotgun mode is also useful for hitting fast targets, but this habit should be kicked as early as possible since the primary fire will destroy squishy targets and will direct your turret’s auto-aim at them, making it extremely difficult for them to avoid your damage.
Forge Hammer:
Now, there isn’t much to say about the Forge Hammer. It’s extremely weak compared to the Rivet Gun up close and isn’t worth the time it takes to pull it out. It can be used to repair your Turret’s health, but you’re nearly always better throwing out another turret and carrying on firing the Rivet Gun.
Overload:
Now it makes sense to discuss Overload, which has replaced Torbjorn’s Armour-Pack ability, because it’s strongly tied to the Rivet Gun. This ability lasts 5 seconds, and has a cooldown of 12 seconds, meaning you can use it fairly often for brief windows of power. Overload temporarily grants you 120 armor, which is useful for getting yourself out of sticky situations, or surprising enemies in duels by effectively doubling your health pool. The real punch, however, comes from the attack speed, reload speed, and move speed buffs. Overload gives you a 30% bonus on all of these, which will help you in all sorts of ways, from chasing targets down to really brawling with other heroes. It also allows you a clutch moment to survive burst damage with the extra health seeing you through a Roadhog hook combo, Doomfist rotation, or even a Tracer bomb.
Just be sure to play around with your five second windows of power because the enemy will be looking to play around the seven seconds of Overload downtime. Now, Overload does a whole lot and is effectively a steroid for Torb’s whole kit, but it needs to be used sparingly. In the right hands, it enables Torbjorn to really put the pressure on the enemy team, and it emphasizes his newfound independence from his turret – Torbjorn 2.0 is a force to be reckoned with even on his own.
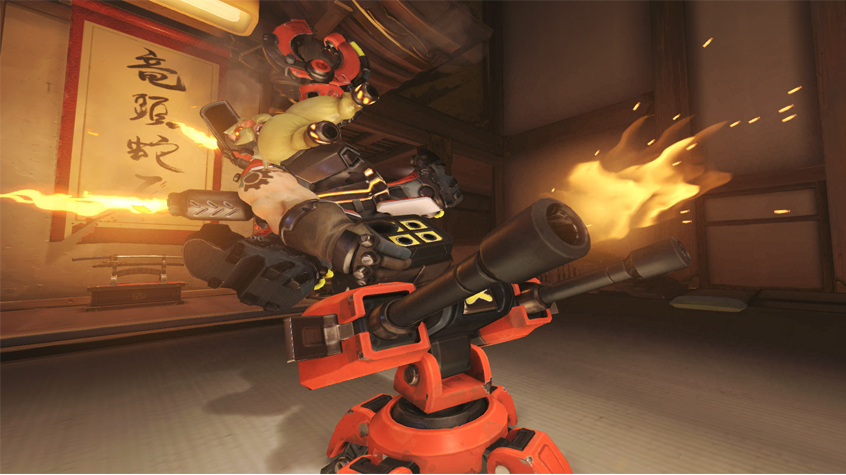
The Turret:
The Turret is the same lock-on, free damage package we know and love, but now comes with a little spice thrown in the mix. The new Turret can be deployed anywhere a hero can normally stand, and I say that because instead of placing the turret down and building it with the Forge Hammer, the Turret is now thrown a decent distance and builds itself over three seconds. This creates a kind of fire-and-forget mentality, with the turret able to be placed in your backline for protection from divers, on the point for a mobile defender, or during small skirmishes and duels for extra damage, and even some effective health if Torb plays around it. It also means the turret can be placed in some really neat locations for flanking enemies and surprising them with its angle of fire. It is especially useful if it can hit them from behind, forcing them to make the difficult decision of choosing to fight Torbjorn or destroy the turret.
The turret can now be used fairly freely, with a few seconds on cooldown before another one can be placed if your last one isn’t in combat. If it is destroyed, either by the enemy or by you, it goes on a ten second cooldown, so again we’re looking at time-critical windows of power. If gone unnoticed, the turret can do a massive amount of damage over a period of time, and will earn you assisted eliminations easily. I found its best uses to be either placed on the payload towards the back, in a corner of the point, overlooking dives, or left behind to protect the backline. It really is a very useful tool now, with a lot less maintenance required as you can always just throw out another. This really helps to reinforce Torbjorn’s power as an area-denial hero, especially in combination with the new Molten Core.
Molten Core:
The old Molten Core is now effectively found built into Overload, leaving space for Torbjorn to acquire a completely new ultimate ability. Molten Core utilizes his claw hand to fire up to ten pools of lava, which each deal a massive amount of damage to heroes standing over them. At around 130 damage per second, heroes won’t want to be standing there for long! This ability is possibly one of the best area-denial tools in the game, and can completely shut down a significant portion of the map. This can make holding a point much easier, especially by trapping enemies without dashes or blinks inside their own spawn zones for a huge amount of time.
Each pool lasts ten seconds, and they don’t stack, so spread them out to either cover the area the enemy team is fighting in or block off zones of the map. Molten Core is especially useful in tight, confined map spaces where there is little room to maneuver. These maps are also where Torbjorn’s other area-denial tools are most effective. The balls of lava won’t penetrate enemy shields, but they will damage them. They can be shot over them by looking up, or even bounced off walls and terrain around shields, corners… get creative!
Molten Core also does extra damage to armored heroes, and I don’t think it’s been discussed much. I actually think that Torb is a really interesting counter to in-meta team-comps that rely on a slow, heavily armored tank or two, like Reinhardt or Orissa. These tanks will struggle to quickly leave the lava, while taking massive damage and having to displace their shields in order to escape. Note that the Rivet Gun’s shotgun form is weak against armored enemies, but strong against their shields. Again, good players will use the primary fire for the heroes instead. Finally, Molten Core is a real pain for an entrenched Bastion (so that pirate ship is ruined), who will find himself sinking into a hot mess while he quickly tries to get his legs working again before they melt!
Overall, Molten Core completes the full Torbjorn 2.0 package – he should really help players to declare which part of the map belongs to them. Working on improving aim with the primary fire, and thinking carefully about where to place his turrets and lava, will separate the good from the bad Torb players, and provide an extremely strong core around which we can expect to see some really interesting team-comp strategies. He’s useful in most situations, but especially in tight spaces, and even more so if the enemy comp is slow and waiting to be melted down to scrap
If you’d like to see another guide for a specific hero, let me know. Thanks for reading, I’ll see you next time for more guides, Anthem and Overwatch updates and gaming coverage.